Baza znanja
How to Recover Your VPS Data in Rescue Mode Ispiši članak
First Read the guide for How to enable Rescue Mode .
Once you have enable Rescue Mode successfully , now you need to login to your VPS using SSH Client .
Download SSH Client : https://www.chiark.greenend.org.uk/~sgtatham/putty/latest.html
Host: Your VPS IP.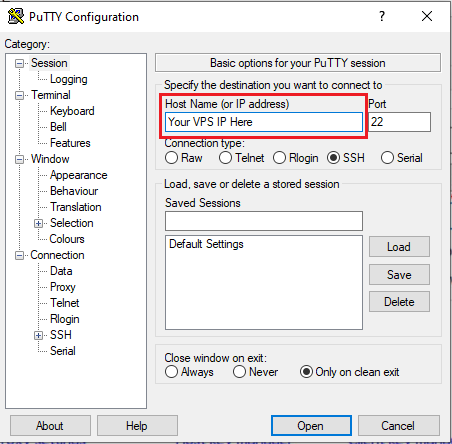
Click on button "Open" , afterwards you will be prompt with login option.
Username: root
Password: Your rescue mode password

Now we need to mount your VPS Disk/Storage to Rescue Mode OS .
Run these command:
fdisk -l
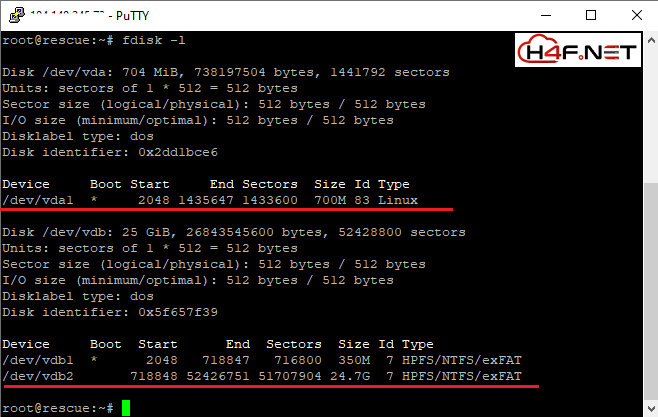
You can see the device name here: /dev/vdb1
In some case, it can be different name such as /dev/sda1 or /dev/sdc1
You should see the size of disk device so detect your VPS disk space.
In many cases you might need to install more packages :
sudo apt updatesudo apt install ntfs-3g
Now, you can need to run below commands to mount this disk to rescue mode OS.
First we need to create mount directory:mkdir /backup
Now we need Mount /dev/vdb2 to /backup folder.mount /dev/vdb2 /backup

We have mounted the /dev/vdb2 successfully .
Now we need to access the mounted directory using sFTP/FTP Software .
Download FTP Client : https://filezilla-project.org/download.php
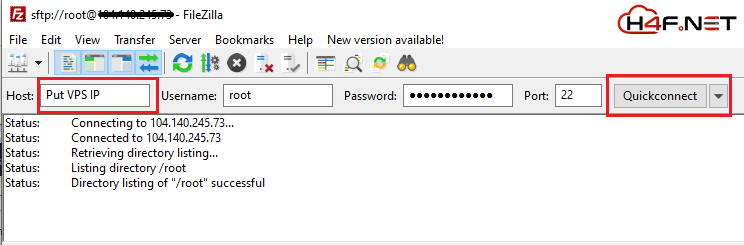
Once login to sFTP successfully ,now you need to go to /backup directory to access your files.
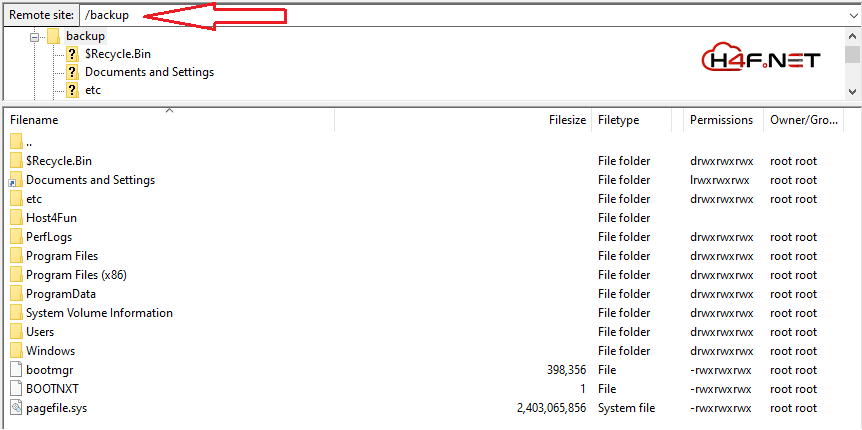
You can see all your data is here .
Now you can download all your important data from here.
Once you have taken backup of your important data , you now need to disable rescue mode by going to your VPS Control Panel.
Click Rescue Mode -> Disable Rescue Mode.

Je li Vam ovaj odgovor pomogao?
Vezani članci
Hi Thank you for choosing service from Host4Fun . Go to run > cmd > slmgr.vbs /rearm and...
By default Windows Server 2008 firewall blocks ping requests. To enable please follow the...
By default Windows Server 2012 firewall blocks ping requests. To enable please follow the below...
Hi , Thank you for choosing Service from Host4Fun.Com. When we run command "yum update" on our...
For Guide Visit :...